
The Honeywell RTH221B is a programmable thermostat designed for compatibility with gas, oil, electric furnaces, central AC, and millivolt systems, offering precise temperature control and energy savings.
1.1 Overview of the RTH221B Model
The Honeywell RTH221B is a programmable thermostat designed to provide precise temperature control for various heating and cooling systems. It is compatible with gas, oil, electric furnaces, central air conditioning, and millivolt systems, making it a versatile option for many households. The thermostat operates on 24-volt or 750mV systems but is not compatible with multi-stage conventional systems or heat pumps with backup heat. Featuring a large backlit display, it allows users to program temperature settings for energy efficiency and comfort. Its programmable functionality enables users to set temperature schedules, reducing energy consumption when the home is unoccupied. This model is ideal for homeowners seeking a reliable and user-friendly solution for managing their HVAC systems effectively.
1.2 Key Features of the Thermostat
The Honeywell RTH221B thermostat offers a range of features that enhance comfort and energy efficiency. It is a 7-day programmable thermostat, allowing users to set custom temperature schedules for different days of the week. The thermostat features a large backlit display for easy readability, even in low-light conditions. It supports automatic changeover between heating and cooling modes, ensuring seamless operation. Additionally, it includes a filter reminder to notify users when the HVAC system’s air filter needs replacement. The RTH221B is also compatible with millivolt systems and operates on 24-volt or 750mV power. These features make it a practical and efficient choice for controlling home heating and cooling systems.
1.3 Compatibility with Heating and Cooling Systems
The Honeywell RTH221B thermostat is designed to work with a variety of heating and cooling systems. It is compatible with gas, oil, and electric furnaces, as well as central air conditioning systems. Additionally, it supports hot water systems with or without pumps and millivolt systems. The thermostat is also suitable for use with central heating and cooling systems and heat pumps without auxiliary or backup heat. However, it is important to note that the RTH221B is not compatible with multi-stage conventional systems or heat pumps that include backup heat. This broad compatibility makes it a versatile option for many home HVAC configurations.
System Compatibility and Requirements
The Honeywell RTH221B operates on 24-volt or 750mV systems. It is not compatible with multi-stage conventional systems or heat pumps with backup heat, ensuring proper system alignment is crucial.
2.1 Supported HVAC Systems

The Honeywell RTH221B is designed to work with a variety of heating, ventilation, and air conditioning (HVAC) systems. It is compatible with gas, oil, and electric furnaces, as well as central air conditioning systems. Additionally, it supports hot water systems with or without pumps and millivolt systems. The thermostat is also suitable for central heating and cooling systems and heat pumps without auxiliary or backup heat. This versatility makes it a reliable choice for many households and commercial spaces. However, it is important to note that it does not support multi-stage conventional systems or heat pumps with backup heat, so compatibility should be verified before installation.
2.2 Voltage Requirements (24V or 750mV)
The Honeywell RTH221B thermostat is designed to operate on 24-volt or 750 millivolt (mV) systems, ensuring compatibility with a wide range of HVAC setups. It is crucial to verify that your heating or cooling system matches one of these voltage requirements to avoid damage or malfunction. The thermostat is not compatible with multi-stage conventional systems, so proper system identification is essential before installation. Always check your system’s voltage specifications to ensure safe and efficient operation. If unsure, consult a professional or refer to the user manual for detailed guidance. Proper voltage matching is critical for optimal performance and longevity of the thermostat.
2.3 Incompatible Systems (Multi-Stage Conventional Systems)
The Honeywell RTH221B thermostat is not compatible with multi-stage conventional systems, which require advanced controls beyond the thermostat’s capabilities. Additionally, it cannot be used with heat pumps that have auxiliary or backup heat, as this configuration exceeds the thermostat’s operational parameters. Users with such systems must select a different thermostat model designed for multi-stage or heat pump compatibility. Before proceeding with installation, it is essential to verify your HVAC system type to ensure proper functionality and avoid potential issues. Refer to the user manual or contact Honeywell support for guidance on compatible systems. Proper system matching is critical for safe and efficient operation.
Wiring Requirements and Complexity
The Honeywell RTH221B requires careful wiring to ensure proper functionality; The thermostat supports 24V or 750mV systems but may pose challenges for multi-stage setups.
3.1 Understanding the Wiring Color Codes
Understanding the wiring color codes is crucial for a successful Honeywell RTH221B installation. Each wire typically corresponds to a specific function: R (24V power), W (heating), Y (cooling), G (fan), and C (common). Some systems may also use additional wires like O or B for heat pumps. Misconnecting these wires can lead to system malfunctions or damage. Always match the wires to their designated terminals on the thermostat. If your system uses a different wiring configuration, consult the manual or contact a professional. Proper wiring ensures safe and efficient operation of your HVAC system.
3.2 Wiring Complexity and Challenges
The Honeywell RTH221B wiring process involves matching colored wires to their respective terminals, but it can present challenges, especially for inexperienced users. While the wiring appears straightforward, issues like wire mismatches or incompatible systems can arise. For instance, systems requiring millivolt or 24V configurations must be carefully assessed to avoid malfunctions. Additionally, heat pumps or multi-stage systems may require special handling, which the RTH221B does not support. If unsure, consulting the manual or a professional is recommended to prevent damage or improper functionality. Proper wiring is critical for safe and efficient operation, so caution and careful planning are essential.
3.3 Tools and Materials Needed for Wiring
To install the Honeywell RTH221B, you’ll need basic tools like a screwdriver, pliers, and wire strippers. Ensure you have the thermostat’s wall plate and mounting screws. Additional materials may include a bubble level for proper alignment and a drill for making holes in the wall. A voltage tester is essential to confirm power is off before handling wires. Use wire connectors or nuts for secure connections. Always refer to the manual for specific requirements, as some systems may need additional components. Proper tools ensure a safe and efficient installation, avoiding potential electrical hazards.

Installation Steps
The Honeywell RTH221B installation involves four main steps: preparing the site, mounting the thermostat, connecting wires, and finalizing setup. This process is straightforward and ensures energy efficiency.
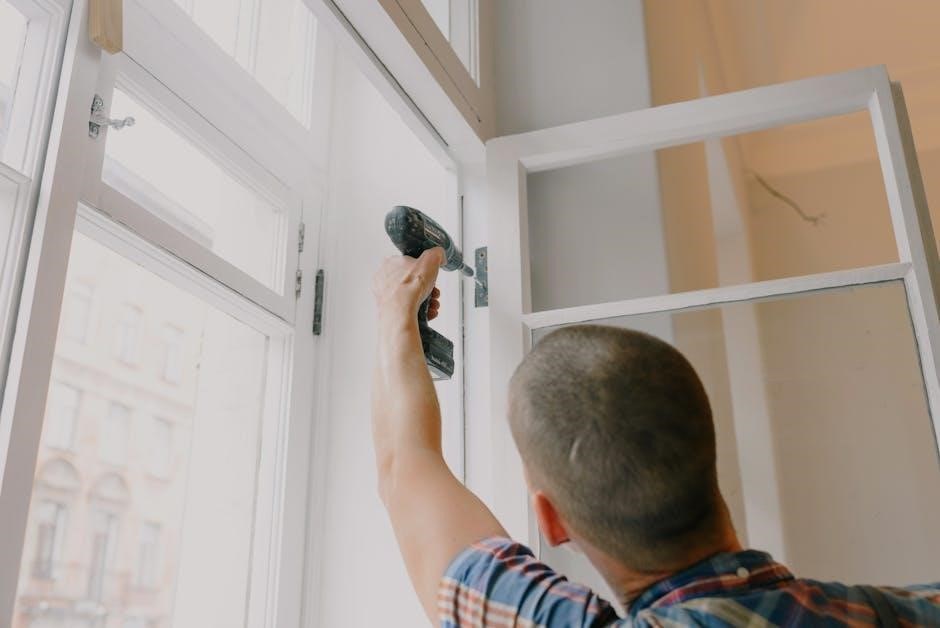
4.1 Preparing the Site for Installation
Before installing the Honeywell RTH221B, ensure the area is safe and ready. Turn off the HVAC system at the circuit breaker to avoid power-related risks. Gather necessary tools, including a screwdriver, drill, and level. Remove the old thermostat carefully, labeling wires for reference. Clean the wall surface and ensure it is level for proper mounting. If no existing thermostat is present, mark the wall based on the provided template. Double-check compatibility with your system type (e.g., gas, oil, or electric furnace) to ensure smooth installation. Proper preparation ensures a secure and efficient setup process.
4.2 Mounting the Thermostat on the Wall
To mount the Honeywell RTH221B thermostat, begin by attaching the wallplate to the wall. Use a level to ensure proper alignment and drill pilot holes if necessary. Insert the provided wall anchors into the holes and screw the wallplate securely into place. Ensure the thermostat is flush against the wall for a professional appearance. Align the thermostat with the wallplate, ensuring it clicks firmly into position. Double-check that all screws are tightened to prevent loose mounting. Once mounted, the thermostat is ready for wiring connections. Proper mounting ensures accurate temperature sensing and reliable performance. Follow the manual for specific alignment instructions.
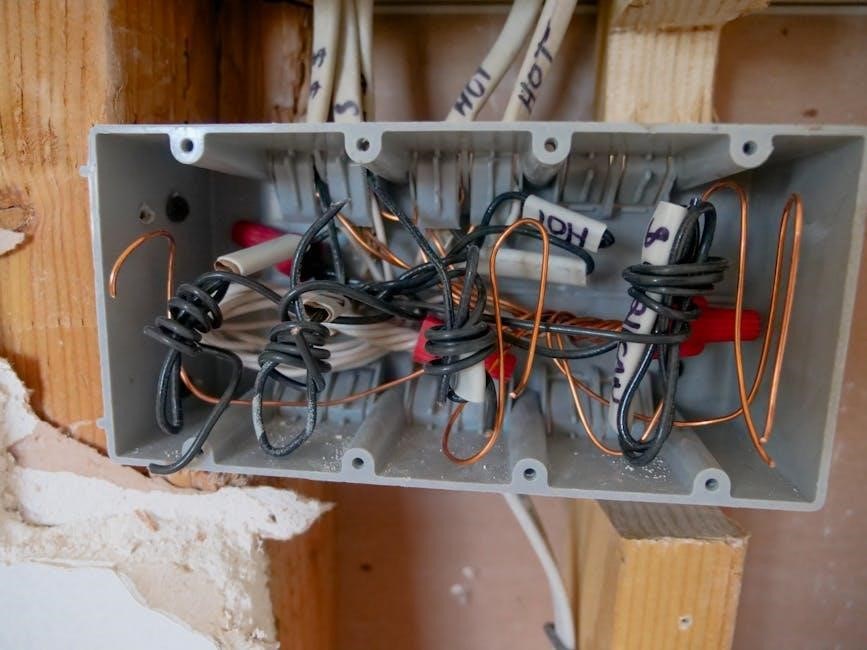
4.3 Connecting the Wires to the Thermostat
After mounting the thermostat, connect the wires to the appropriate terminals on the wallplate. Refer to the wiring diagram in the manual to match the correct colors to their respective functions (e.g., R, W, Y, G, C). Use needle-nose pliers to straighten and insert the wires into the terminals, ensuring they are securely fastened. Common wires include the power wire (R), heating wire (W), cooling wire (Y), fan wire (G), and common wire (C). Avoid crossing or twisting wires to prevent short circuits. Double-check connections to ensure they match your system type (e.g., Rh for heat pumps). Once connected, tighten all terminal screws firmly. Turn the power back on and test the system to confirm proper operation.
4.4 Finalizing the Installation
Once all wires are securely connected, replace the thermostat faceplate and ensure it is properly aligned with the wallplate. Tighten the screws gently to avoid damage. Restore power to your HVAC system and test each mode (heating, cooling, fan) to verify functionality. Check for any error messages on the display screen. Program the thermostat with your preferred temperature schedule and set the clock and day. Review the settings to ensure they match your system type. Finally, dispose of any packaging materials responsibly and retain the manual for future reference. This completes the installation process for the Honeywell RTH221B thermostat.

Advanced Installation Setup
Enter System Setup Mode by pressing and holding ‘S’ and ‘T’ buttons until the display changes, then match the thermostat to your system type for optimal performance and system compatibility.
5.1 Entering System Setup Mode
To enter System Setup Mode, press and hold both the ‘S’ and ‘T’ buttons simultaneously for approximately 5 seconds until the display changes. This mode allows you to configure advanced settings to ensure the thermostat operates correctly with your specific HVAC system. Proper setup is crucial for optimal performance and compatibility. If the system type is not matched correctly, it may lead to improper heating or cooling operation. The thermostat is compatible with 24V or 750mV systems but is not suitable for multi-stage conventional systems or heat pumps with backup heat. Ensure your system type is accurately selected during this process for reliable functionality.
5.2 Matching the Thermostat to Your System Type
After entering System Setup Mode, navigate to the system type selection to ensure proper configuration. The Honeywell RTH221B is compatible with gas, oil, or electric furnaces, central air conditioners, and millivolt systems. It also supports heat pumps without auxiliary heat and central heating/cooling systems. However, it is not compatible with multi-stage conventional systems or heat pumps with backup heat. Use the navigation buttons to scroll through the system type options and select the one that matches your HVAC setup. Accurate system type selection is critical for proper thermostat operation and energy efficiency. If unsure, refer to the user manual or contact Honeywell support for assistance.

Programming and Features
The Honeywell RTH221B allows setting the clock, day, and temperature schedules for energy efficiency. The display screen shows current settings, ensuring easy monitoring and adjustments. Features include programmable options for optimal comfort and energy savings.
6.1 Setting the Clock and Day
Setting the clock and day on the Honeywell RTH221B is essential for proper thermostat operation. Press the SET CLOCK button to enter the clock setup mode. Use the up or down arrows to adjust the hour, minute, and day. Once set, the thermostat will automatically save the time and return to the home screen. Accurate time settings ensure scheduled temperature changes occur correctly. The display screen will show the current time and day, providing a clear reference for programming. This step is crucial for maintaining energy-efficient temperature schedules and ensuring the thermostat functions as intended. Proper synchronization helps in optimizing heating and cooling operations.
6.2 Programming the Temperature Schedule
Programming the temperature schedule on the Honeywell RTH221B allows you to customize comfort settings for different times of the day and days of the week. Press the SET SCHEDULE button to enter programming mode. Use the up and down arrows to adjust the temperature levels for Wake, Leave, Return, and Sleep periods. The thermostat supports up to four programmable periods per day. Set the desired temperature for each time block, ensuring it aligns with your daily routine. Once programmed, the thermostat will automatically adjust temperatures according to your schedule. Review and adjust settings as needed to optimize energy efficiency and maintain comfort levels throughout the day. Proper programming ensures consistent performance and energy savings.
6.3 Understanding the Display Screen
The Honeywell RTH221B display screen is user-friendly, showing essential information at a glance. It features a backlit LCD display, making it easy to read in low-light conditions. The screen displays the current temperature, set temperature, and time, as well as the active heating or cooling mode. Icons indicate the system status, such as Heat On, Cool On, or System Off. The display also shows reminders, like Change Filter, to help maintain your system’s efficiency. Use the up and down arrows to adjust settings and navigate through the menu. The display’s clarity and intuitive design ensure that users can easily monitor and control their home’s temperature settings. Regular updates keep the interface responsive and functional.

Troubleshooting Common Issues
Identify common issues with the Honeywell RTH221B, such as wiring problems or system incompatibility, and find solutions in the manual or by contacting support.
7.1 Common Installation Problems
Common installation issues with the Honeywell RTH221B include wiring errors, such as incorrect wire connections or loose terminals, which can prevent proper functionality. Additionally, system incompatibility may arise if the thermostat is installed on unsupported systems like multi-stage conventional or heat pumps with backup heat. Users may also encounter display malfunctions, such as the screen not turning on or incorrect temperature readings. To resolve these, ensure all wires are securely connected, verify system compatibility, and check the power source. For persistent issues, refer to the installation manual or contact Honeywell support for assistance.
7.2 Solving Wiring-Related Issues
Wiring-related issues can be resolved by ensuring all connections are secure and correctly matched to the appropriate terminals. First, verify that the power is off before handling any wires. Check the wire labels against the thermostat’s terminal diagram in the manual. If wires are loose or incorrectly connected, reattach them to the proper terminals. For systems with common wire requirements, ensure the “C” wire is connected if necessary. If the display is blank, check for proper 24V or 750mV power supply. Consult the wiring guide or contact Honeywell support for assistance with complex configurations.

7.3 Addressing System Compatibility Problems
When addressing system compatibility problems with the Honeywell RTH221B, it’s essential to recognize that this thermostat is not compatible with multi-stage conventional systems or heat pumps with backup heat. These systems require advanced controls that the RTH221B cannot provide. To resolve such issues, ensure your HVAC system aligns with the thermostat’s specifications. If you have a multi-stage system, consider a different thermostat model designed for such setups. For heat pumps, verify that your system does not rely on auxiliary heat. Always refer to the Honeywell support page for detailed compatibility checks and troubleshooting guides.
Proper installation ensures optimal performance. Verify all connections and settings. For further assistance, visit Honeywell’s official support page or call 1-800-468-1502.
8.1 Final Checks and Verification
After installation, ensure the thermostat is level for proper operation. Verify the clock and day are set correctly. Check all wiring connections for accuracy and security. Test the system by running a heating or cooling cycle to confirm functionality. Review the programmed settings to match your preferences. If issues arise, refer to the manual or contact Honeywell support at 1-800-468-1502. Proper verification ensures energy efficiency and optimal performance. Double-check the thermostat’s compatibility with your HVAC system to avoid operational issues.
8.2 Where to Find Additional Support
For further assistance, visit the official Honeywell Home support website. Download the RTH221B user manual or installation guide for detailed instructions. Contact Honeywell’s toll-free helpline at 1-800-468-1502 for expert guidance. Additional resources, including troubleshooting tips and system compatibility checks, are available online. Ensure you consult official sources for accurate and reliable information to maintain your thermostat’s performance and warranty.
8.3 Importance of Proper Installation
Proper installation of the Honeywell RTH221B thermostat is crucial for ensuring optimal performance, energy efficiency, and system safety. Incorrect wiring or setup can lead to malfunctions, increased energy bills, or even damage to your HVAC system. Always follow the installation manual and manufacturer guidelines to avoid such issues. Proper installation ensures compliance with safety standards and maintains the product warranty. If unsure, consult a licensed professional or contact Honeywell’s support team for assistance. Correct setup guarantees reliable temperature control and long-term system efficiency, making it essential to prioritize careful and accurate installation.